Showing posts with label Food. Show all posts

Saturday, August 5, 2017

Cherry and Cream Cheese Overnight French Toast

The other day while having breakfast at Panera I decided to take home a French baguette to have with dinner.  The intention was to make a cheese board and wash it down with the obligatory bottle of red wine but for some reason this did not happen.  I don’t recall why but two days later I found myself with a stale baguette.

I took to Pinterest for inspiration on what to do with it and came across a recipe I’d pinned ages ago.  I had all the required ingredients on hand (with some minor modifications) including the leftover cherries I had frozen after finding them for such a great deal a couple of weeks ago!

First, tear your bread into chunks and place half of them in the bottom of a greased pan.  Normally I would cram more bread in there, but I had a small-ish loaf and was worried I wouldn’t have enough.


Next scatter some chunks of cream cheese and fresh or frozen cherry halves across the top.   Cover the cream cheese and cherries with the remaining bread chunks, whip up your French Toast mixture (eggs, 1/2 and 1/2, brown sugar, vanilla, and spices) and pour it over the top, thoroughly soaking the bread.  Cover with foil and refrigerate overnight.  (If you’re blogging, forget to take pictures of those last 3 steps.  It keeps things interesting.)


The next morning, set your oven to 350 degrees Fahrenheit and allow the covered casserole to sit at room temperature while the oven preheats.  Bake covered for 20 minutes.  Remove the foil and bake another 20 minutes or until the top is golden brown and the bottom isn’t a soupy eggy mess.

Cut a generous square for yourself and drizzle with maple syrup.  Unfortunately, what landed on my plate wasn’t exactly photogenic but it sure did taste good!  My husband commented that it was “absolutely delicious” and suggested that I use even more cherries next time.


Cherry and Cream Cheese Overnight French Toast
1 French baguette (day old or stale)
1 8oz block of cream cheese, cubed
1c fresh or frozen cherry halves
6 eggs
2c 1/2 and 1/2
1/2c brown sugar
2t vanilla extract
1t cinnamon
1/2t nutmeg
dash cloves
Maple syrup for serving

1 – Butter or grease a 9×13″ baking pan.  Tear the baguette into pieces and place half in the bottom of the prepared pan.   Scatter the chunks of cream cheese and fresh or frozen cherry halves across the top.   Cover the cream cheese and cherries with the remaining bread pieces.

2 – Mix together the eggs, 1/2 and 1/2, brown sugar, vanilla, and spices.  Whisk well and pour the mixture over the top,  thoroughly soaking the bread.  Cover with foil and refrigerate overnight.

3 – Preheat oven to 350 degrees Fahrenheit.   Remove the casserole from the fridge and allow to sit at room temperature while the oven warms.  Bake covered for 20 minutes.  Remove foil and bake an additional 20 minutes or until the top is golden brown and most of the egg mixture has been absorbed.

4 – Remove from the oven and allow to cool briefly.  Cut into squares and serve with maple syrup.  Refrigerate leftovers.

Adapted from Manila Spoon

Friday, July 7, 2017

Rhubarb Streusel Cake with Vanilla Sauce

The rhubarb abundance continues and therefore so do the rhubarb recipes!  This is actually the third rhubarb recipe I've made in the last couple of weeks but only the second I'm posting about.  (The other recipe was a Strawberry Rhubarb Pie, which while delicious, was not very pretty.  I'll try again on that one!)

This is one of those recipes that sounds kind of fancy but is actually fairly simple to throw together! First, fold 3 cups of chopped rhubarb into a buttermilk batter.


Next, spread the batter into a greased pan and sprinkle a simple streusel topping over the top.


Bake at 350 for about 45 minutes and until the top is golden brown.  (Mental note to self:  use Windex on glass cooktop prior to taking and uploading photos for blog post.)


It will look golden and beautiful and you will want to dig right in, but for the love of baking powder, please allow it to cool a bit!  Make the vanilla sauce while you wait.

Once the cake (and sauce) have cooled to a not mouth-scorching temperature, pour over a generous amount of the vanilla sauce and serve!


Rhubarb Streusel Cake with Vanilla Sauce
Batter
2T salted butter, softened
1c sugar
1 egg
2c all-purpose flour
1t baking powder
1/2t baking soda
1c buttermilk
3c fresh rhubarb, chopped

In a large bowl, cream butter and sugar.  Beat in egg.  In a separate bowl, combine flour, baking powder, and baking soda.  Stir flour mixture into creamed mixture, alternating with buttermilk.  Beat just until moistened - do not overmix.  Fold in the rhubarb and pour into a greased 9" square baking dish.

Streusel Topping
1/4c all-purpose flour
1/4c sugar
2T butter, melted
Combine all ingredients.  Sprinkle over prepared rhubarb batter.  Bake at 350 degrees Fahrenheit for 45 minutes or until a toothpick inserted in the center comes out clean.  Allow to cool.  Top with Vanilla Sauce and serve.

Vanilla Sauce
1/2c salted butter
3/4c sugar
1/2 evaporate milk
1/2 vanilla bean, scraped

Melt the butter in a saucepan.  Add sugar, evaporated milk, and scraped vanilla bean.  Bring to a boil, stirring constantly for 2-3 minutes or until thickened.  Remove from heat.  Allow to cool slightly and transfer to a storage container.  Refrigerate leftovers.

Lightly adapted from My Baking Addiction

Thursday, June 15, 2017

Rhubarb Pudding Cake

An abundance of rhubarb in my and one of my good friends backyards meant it was time to get baking.  (It's good to have friends with gardens - she gave me a lot of rhubarb!)  First on my baking list is the super easy Rhubarb Pudding Cake.  With an ooey gooey not-to-sweet center and a crispy sugary crust, this recipe is sure to be a hit with kids and grown ups alike!

Here we have about 2 cups of chopped rhubarb spread across the bottom of a 9" square pan.


Next you'll spread the prepared batter evenly over the top of the fruit and follow that with a healthy (ok, not "healthy" per se...) sprinkling of sugar and cornstarch.


Now for the part that made me do a double-take the first time I saw this recipe:  Pour boiling water over the top.

"Did I read that correctly?"   Yes you did.  Yes it's very soupy looking.  Yes it will be ok.


Bake at 375 for 45 minutes and you'll have this golden brown dessert that is both gooey and crispy.  It's best served hot straight out of the oven with some sweetened whipped cream, but isn't too shabby eaten cold straight out of the pan the next day either.  Not that I would know that personally. *cough*


Rhubarb Pudding Cake
2c rhubarb, chopped
1 3/4c sugar, divided
3T salted butter, melted and cooled
1t baking powder
1/2c milk
1t vanilla extract
1c all-purpose flour
1T cornstarch
2/3c boiling water

Preheat oven to 375 degrees fahrenheit. 

Spread chopped rhubarb over the bottom of a 9" baking pan.

In a bowl, mix together 3/4c sugar, butter, baking powder, vanilla, milk, and flour.  Spread batter evenly over rhubarb.

Combine remaining 1c sugar and cornstarch and dprinkle over the batter.  Pour boiling water over the top.

Bake for 45 minutes or until golden brown and bubbling.

Wednesday, April 19, 2017

Graze Box Review

I've been subscribing to Graze for a couple of years now.  I have no idea why it took me so long to write a post about it.  I love it!  I've subscribed to a couple of other snack boxes over the years but this is the only one I've stuck with.


Graze Snack Box allows you to decide how often you want to receive a box, from weekly, bi-weekly, or monthly.  They also allow you to rate the snacks you receive and customize your boxes.  If you tag something as a "Love" you'll receive it fairly frequently.  If you "trash" it you'll never receive it again.  They make it easy to do too.  As you can see from the screenshot below, I "trashed" Banana Cream Pie.  I do not like their chewy banana coins.  At all.  So I sorted the snacks by category on their site, scrolled through all the fruit, and trashed everything with banana coins.


A booklet with nutritional information is included with every order so it's easy to avoid certain allergens and/or stay on track with calories or carbs.  You can even order boxes specific to diet plans by choosing low-sugar or low-calorie (under 150 calories) snack boxes.
If a snack subscription box is something you might be interested in you can check it out here - https://www.graze.com/us/.  If you'd like to get your first and fifth box free you can enter my referral code below and help me earn free snacks too!  Happy snacking!


Thursday, March 16, 2017

Brown Sugar Banana Bread

The quickly over ripening bananas on my kitchen counter recently dictated that I needed to make banana bread.  Instead of using one of my go-to banana recipes, like whole wheat banana bread or banana snack cake, I decided to bust out one of my many cookbooks and test out a new recipe.

I remembered there being a couple of banana themed baked goods in The Back in the Day Bakery Cookbook so I grabbed that one.   It didn't disappoint!  For a moment I was nearly swayed by the cupcakes but decided to go with a breakfast friendly item instead.  (Side note:  I totally support eating cake for breakfast.  Don't tell my kids I said that.)


The recipe turned out beautifully!  Waiting for it to cool a bit before slicing into it when your kitchen smells that good is its own form of torture!  Moist and not overly sweet, this bread is the perfect accompaniment to a glass of milk at breakfast or with a cup of afternoon tea .


Brown Sugar Banana Bread
2c all-purpose flour
3/4c light brown sugar
3/4t baking soda
1 1/2t cake spice*
3 medium very ripe bananas, mashed
1/4c sour cream
2 large eggs
6T unsalted butter, softened
1t vanilla extract
1/2c mini chocolate chips (optional)
 
Preheat oven to 350 degrees.  Lightly spray a 9x5 inch loaf pan with nonstick cooking spray.
In a large mixing bowl, whisk together the flour, brown sugar, baking soda, salt, cake spice, and mini chocolate chips if using.
Using a stand mixer with the paddle attachment, or by hand, mix the mashed bananas, sour cream, eggs, softened butter, and vanilla until thoroughly combined.  By hand, gently fold the banana mixture into the flour mixture until just combined.  Do not over mix.
Scrape the batter into the prepared loaf pan and spread it evenly.  Bake 50-55 minutes or until the loaf is golden brown, and a cake tester or toothpick inserted into the center of the loaf comes out clean.  Allow bread to cool in the pan for 10 minutes before transferring to a wire rack.
*Cake Spice is cinnamon, star anise, nutmeg, allspice, ginger, and cloves.  If unavailable, simply substitute 1/2-1t cinnamon.
 
Recipe lightly adapted from The Back in the Day Bakery Cookbook

Thursday, March 2, 2017

Simple Slow Cooker Beef Tips

This is a recipe that I first came across on my Pinterest feed.  I don't recall whom among my friends or family pinned it but I owe them a cookie.  This is quick and easy to throw together and there's a good chance you already have the ingredients on hand!  I've made this a few times now and it's one of my husband's favorites!
All you do is -
Heat about 1T of oil in a large pan or the stove top safe insert of your slow cooker.  Add the stew meat and brown until the meat is all nice and carmelized on the outside.  Remove the insert to back to the base or pour the meat and juices into your slow cooker at this point.

Browning first for better flavor!
Mix together your remaining ingredients, pour over the meat, and turn your slow cooker to low.

Pamtry staples are all in order
Carry on with your daily business and 8 hours later you'll have tender beef tips in gravy that are ready to be served over potatoes or noodles!

Served with crusty bread and a vegetable my kids will eat!


Simple Slow Cooker Beef Tips
2lb beef stew meat
1 pkg  dry onion soup mix
1 pkg reduced sodium brown gravy mix*
1 10.5oz can cream of mushroom soup
1c water
1T oil
Pepper to taste

1 – Brown the beef stew meat in the oil and season with pepper.

2 – Mix the Cream of Mushroom, Onion Soup, Gravy mix, and water in a large bowl.

3 – Pour over the stew meat and stir to combine.

4 – Cover and cook on low for 8 hours.  Serve over mashed potatoes or egg noodles.

Notes:  If crunched for time you can skip browning the meat beforehand.  Omit the oil.

*This is a salt heavy recipe which is why I recommend reduced sodium gravy mix.  I have also used Heart Healthy Cream of Mushroom soup in addition to the reduced sodium brown gravy mix to even further reduce the sodium - it was still great!

Lightly adapted from Just a Pinch Recipes

Saturday, February 4, 2017

What I'm Reading: French Country Cooking

While browsing the New Release section the other day, French Country Cooking:  Meals and Moments from a Village in the Vineyards caught my eye.


"Amid Mrs. Thorisson's recipes are stories of the home's past, as told to her by previous owners and village old-timers.  Readers will learn tales of multiple generations of cooks together in the French country kitchen."  Wall Street Journal
 
I'm only about a quarter of the way into this book and so far I'm in love...  with the author's house!  In the first few pages she describes the home, its history, the antiques she found hidden away, and... cue jealousy!  It's my dream to live in a huge old house and to spend my days hunting for antiques to fill it with.  But I digress...

I'm also loving the recipes of course!  It was my unfamiliarity of French cooking that caused me to grab this book off the shelf in the first place.  Each recipe is preceded by a story or some history (which I love) and many of the recipes are familiar and more simple than I expected.  Note that I said "many of the recipes".  Not all.  Take Everyday Pear Cake for example.  Both familiar and simple.  Far Breton?  Simple but not familiar.  (It's a custard cake with rum and prunes.)  Cassoulet?  Sounds familiar but definitely not simple.  (Do the French typically have goose fat on hand?)

The photography is beautiful:


Everyday Pear Cake
 
Comte, Ham, and Walnut Feuillite
Pain D'Epices
 
I intend to read through the rest of the recipes and then settle on a couple of the unfamiliar but simple ones to test out first!  Happy cooking!

Friday, January 13, 2017

Sur la Table Pumpkin Spice Doughnut Mix Review

 
I love (and prefer) baking from scratch but will readily admit that there is a time and a place for box mixes.  My local Sur la Table had their Pumpkin Spice box mixes on major sale a while back so I grabbed a couple different varieties.
 
Quick side note... Did you know that BAKED (the famed Brooklyn bakery) makes the box mixes especially for Sur la Table?!  I have a couple of their cookbooks and their recipes are awesome!  Onward...

These Cinnamon Sugar Pumpkin Spice Donuts were very simple to whip up.  They required only the addition of eggs, water, and oil to the batter and the cinnamon sugar packets that were already in the box.  11 minutes later my kitchen smelled delicious and I was sprinkling cinnamon sugar over warm cake doughnuts.  They were moist and springy and tasted as good as they smelled!  I won't hesitate to stock up the next time I find their mixes on sale. :)


Sunday, November 27, 2016

Easy Pumpkin Bundt Cake

A couple of weeks ago it dawned on me that fall was nearly over and I hadn't made a single autumn-type baked good. Typically I'd have made a batch of apple butter weeks ago,  followed by baking so many muffins and loaves of pumpkin bread to go with it that I'd almost be sick of them by now! 

Last weekend my house was filled with the smell of Slow-Cooker Apple Butter so I decided it was high time I got to using the case of canned pumpkin in my pantry.
 
 
This cake is absolutely wonderful and is super easy to whip up thanks to boxed cake mix.  It's also super moist and delicious on it's own - no cream cheese glaze or apple butter necessary!  (Though I always slather a slice with the latter because, well, apple butter is amazing.  And I have 6 jars of it. ) :D

 
Easy Pumpkin Bundt Cake
1 box yellow cake mix
1/3c granulated sugar
4 eggs
1/3c vegetable oil
1/4c water
1/3c sour cream
1 15oz can pure pumpkin
1T pumpkin pie spice
 
1 - Preheat oven to 325 degrees.  Generously grease and flour a 10-cup Bundt cake pan.
2 - In a large bowl, mix all ingredients with an electric or stand mixer on low speed until moistened, then on medium speed until well combined.  (Or mix by hand 2 minutes or until well combined.)  Pour batter into prepared pan.
3 - Bake 45-50 minutes or until toothpick inserted in the center comes out clean.  Allow to cool in the pan for 10 minutes before inverting onto a cooling rack.  Cool completely before serving.
Recipe adapted from Betty Crocker

Tuesday, November 8, 2016

Fish with Spicy Tomatoes

This is one of the easiest, tastiest, and healthiest recipes I have ever come across!  It's been a busy weeknight go-to of mine for a while now and was in pretty heavy rotation while I was on a low-carb diet. 
Pictured here with flounder! 
 
I typically serve it over brown rice but also love it with roasted zucchini or a side of broccoli when I'm watching my carbs. 
Please note that the tomatoes have quite a spicy kick!  If spicy isn’t your thing then either substitute another can of diced tomatoes for the tomatoes with chiles, or cut the creole seasoning by half.


Fish with Spicy Tomatoes
4 – 4oz fillets of white fish (flounder, cod, or tilapia)
1T olive oil
½ onion, chopped
2 cloves garlic, minced
14.5oz can diced tomatoes, drained
10oz can diced tomatoes with chiles, drained
1T creole seasoning

In a large skillet, heat the oil over medium heat.   Sauté the onion and garlic in the olive oil for 2-3 minutes.  Add both cans of tomatoes and creole seasoning.  Stir until heated through.

Lay fish fillets over the sauce and cover.  Cook 10-12 minutes or until fish flakes easily with a fork.

Serve over brown rice and/or with a side of roasted vegetables

Monday, October 10, 2016

Project: Recipe Cleanout - Chocolate Cake with Pudding Frosting

My daughter requested a chocolate cake with chocolate frosting for her birthday.  Baking this cake was somewhat of an adventure despite the fact that I’ve probably baked close to one hundred cakes previously.  Both of my daughters were in the kitchen helping measure this or adding that, and after we put the pans in the oven and were cleaning up, I grabbed the sugar canister to put it back in the cabinet and  thought, “Sugar...  I don’t recall asking anyone to measure out sugar.  Shoot.”  So, the half-baked cakes came out of the oven to cool, were tossed in the trash, and we started over.  I decided it was good lesson for my daughters to learn -  the importance of carefully reading and double-checking a recipe.

This is the first recipe from my binder that is part of my Recipe Cleanout project.  This is a cake recipe that I’ve had on file for years but have never gotten around to making until now.  It receives very high ratings on Hershey’s website so I had high hopes. The only adjustment I made for the cake batter was to use coffee in place of the water.  (Coffee enhances the chocolate flavor in recipes in case you weren’t aware.)   Then, instead of their frosting  I decided to pair it with a delicious but simple frosting recipe that I've been making for eons.  I used chocolate pudding for this recipe, but it’s great with other flavors (like vanilla and Oreo) as well!


True to my Project: Recipe Cleanout commitment, I’m letting you know that this is not the best ever chocolate cake as the multitude of 5 star reviews would lead you to believe.  It looked beautiful out of the oven and it’s super moist, but the flavor of the cake by itself is just sort of “meh”.  The frosting is what made it delicious overall (and I’m wondering if their frosting too is the reason for the great reviews.)

Since the cake was a bit of a let down I won't be posting the recipe here.  The recipe for the super simple and versatile pudding frosting I will share though!  It's the perfect frosting for cake or brownies, as a dip for animal or graham crackers, and as a layer in pudding pies or trifles!

Easy Pudding Frosting
1 - 3.9oz box instant pudding mix
1c milk
1 - 8oz tub whipped topping, thawed
In a medium mixing bowl, whisk together pudding mix and milk by hand for two minutes.  Allow pudding to set and thicken for 5 minutes.  Whisk in whipped topping.

Makes enough frosting for a 2-layer cake.  Refrigerate any leftovers.

(Cake recipe reviewed here was slightly adapted from Hershey's . Pudding frosting recipe is my own.)

Monday, October 3, 2016

Dump and Done Ramen Salad

The second recipe I prepared from Chrissy Teigen’s book Cravings is her Aunt Debby’s Dump and Done Ramen Salad.  It's very similar to the traditional ramen noodle salad made with coleslaw mix that many of us have eaten at picnics a hundred times, but this one I like better for a couple of reasons.  1 – I think the broccoli slaw holds up better in dressing.  (I was still enjoying the leftovers on day three whereas the coleslaw version would’ve been a soggy mess by the second day.)  2 – The addition of extra veggies...  Extra veggies means extra healthy, which means you should eat multiple servings.  Right?  Right.

You absolutely should make this for your next Potluck or family barbecue!  Super easy to throw together,  full of veggies, and just plain delicious.  It was the perfect accompaniment to a brat and baked beans.  And then perfect again by itself as a quick lunch the next day!

 
Dump and Done Ramen Salad
3 - 3oz packages chicken flavored ramen noodles
1 - 12oz package broccoli slaw
1/2c red onion, thinly sliced
1c frozen peas
3/4c frozen corn
1/2c sugar
1/3c oil
1/2c apple cider vinegar
1c roasted and salted sunflower seeds
Crush the ramen noodles into a large bowl and set the seasoning packets to the side.  Mix in the broccoli slaw, onion, peas, and corn. 
In a microwave-safe bowl, combine the sugar, oil, apple cider vinegar, and seasoning packets.  Microwave on high for 1 minute.  Stir well and pour over the slaw mixture.  Toss until combined.  Refrigerate at least 3 hours or overnight.
Toss in the sunflower seeds just before serving.
Note - The salad will lose some of it's crunch by the second and third day (if it lasts that long!)  If you're making it for a smaller group and anticipate leftovers, only set out half the salad and mix in half the sunflower seeds.  The remaining sunflower seeds will add back in some of the lost crunch to the leftover salad the next day.
 
Recipe adapted from Cravings

Thursday, September 22, 2016

Project: Recipe Clean Out

 
I stopped counting the printed recipes stuffed into the front pocket when I got to 98.  At that point I realized I could just say, "There are over 100."

Does anyone else have a binder with 5,362 recipes in it?  That's an exaggeration of course, but it really is a nearly overwhelming amount!  This binder is one of the reasons I started blogging – to keep track of things.  I tear recipe after recipe out of magazine after magazine with the full intention of making every single one, but of course, in reality I only test out one here and there and often return to family favorite recipes instead.

This binder is the compilation of years’ worth of recipe tear-outs.  When I first started this binder I was very organized in regards to Breakfast, Sides, Desserts, etc.  I also used to be very good about checking to see if a recipe was available online and could be saved to that sites “recipe box” before stuffing yet another page into the binder.  “Used to” being the key words here.  Now, (and for quite some time), I rip out a recipe telling myself that I’ll check the magazine’s website later, but of course later never comes and the binder disaster you see pictured above is the result.

The organized pages - Pasta
The organized pages - Breakfast

So… let “Project Recipe Clean Out” begin!  Recipes that I’m realistically just never going to make, like Mexican 16-Bean and Tomato Stew (no one else in my family would eat it), and Egg Foo Young (zero chance I'll make it better than the restaurant down the street), are going to get tossed into the recycle bin.  The other recipes I’m going to commit to making at least one a week.  Hopefully one from each category.  (Why not aim for an entire meal right?)  And I’m going to post about it regardless of whether it turns out or not because...

Between online recipe folders, my binder, and Pinterest, I have ended up with the same exact recipes in different places. (Hence the main reason for me needing to keep track.)  I often don’t discover this until after I prepare one and there’s a quizzical look from my husband followed by, “Haven’t you made this before?”  When the answer to that question is “Yes,” he inevitably asks, “Well why didn’t you write it down?”   When the answer to that question is, “No,” I get a squinty eyed doubting look and, “I think you did.  You just don’t remember.  We both know you don’t write anything down.”
Hmph.
Well dearest husband...  Now I shall.  :D

Friday, September 9, 2016

What I'm Reading: Back in the Day Bakery Cookbook


It’s no secret that I love cookbooks - antique and vintage cookbooks in particular.  The older the book and the more handwritten recipes on the inside cover the better!  I’ve amassed quite a collection of cookbooks, both old and new over the years, so shelf space (and husband) now require that I use a little more discretion when purchasing yet another.
The Back in the Day Bakery Cookbook caught my eye at the bookstore the other day.  Based on the title, I immediately assumed it contained recipes passed down through families from one generation to the next, and I was delighted when I realized that it was!  Grandma Hannah’s Blueberry Buckle?  Yes please!  The Ginger Squares Grandma Hannah learned to make from her grandma?  Major score! I have to say this is the next best thing to finding a vintage cookbook chock full of handwritten recipes at a resale shop or garage sale!

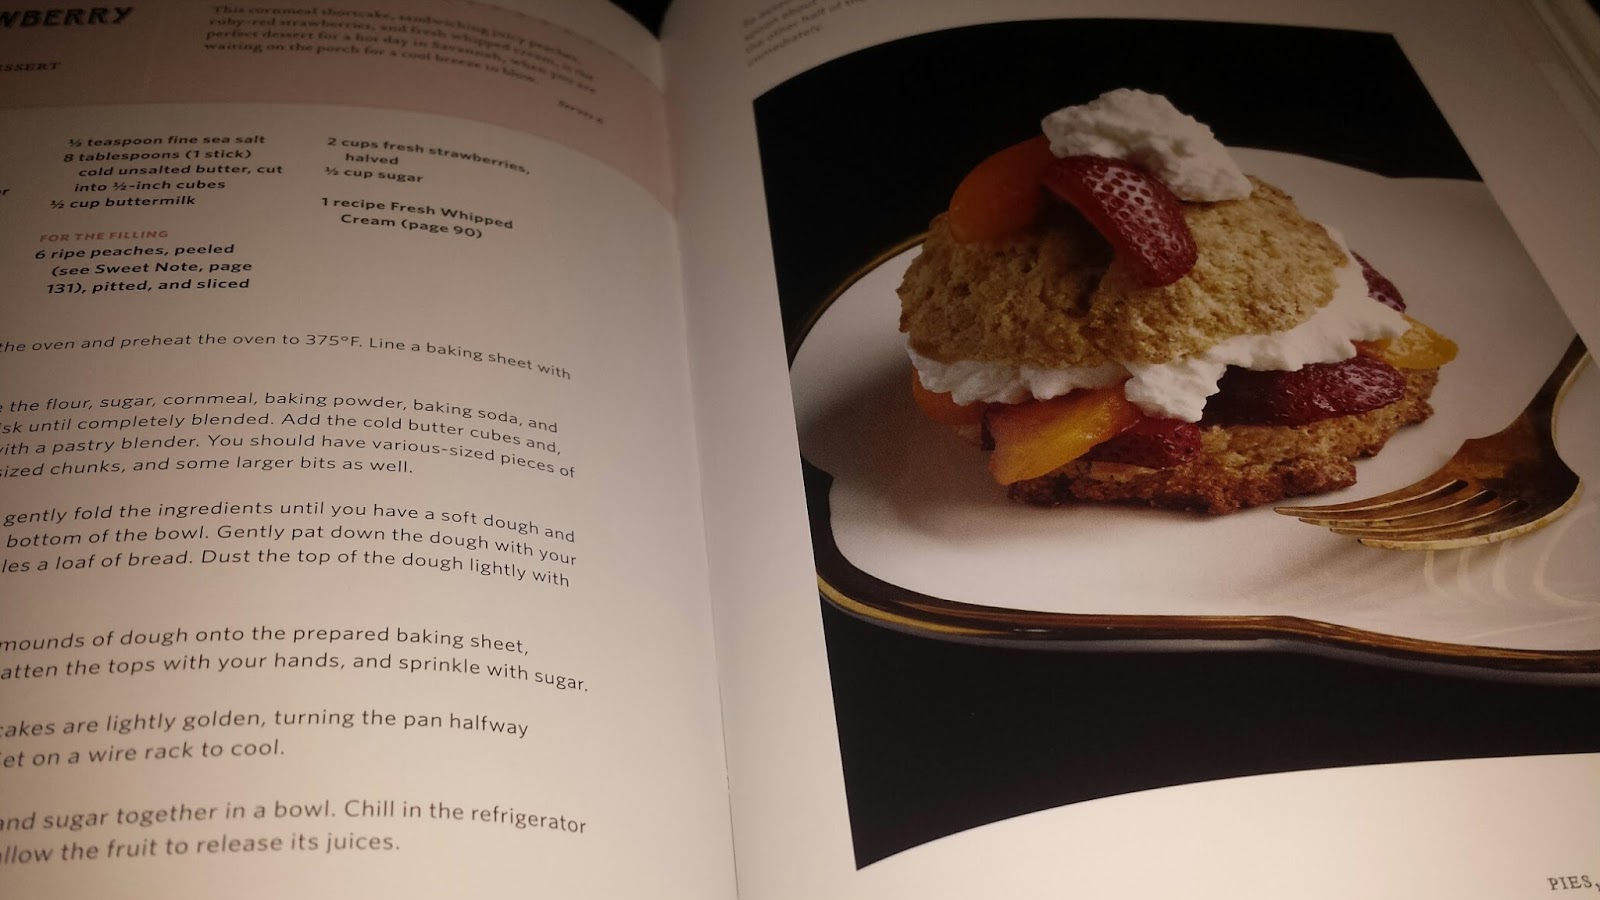
The decision to buy this cookbook was easy.  The decision of what recipe to make first though…  Not so easy.  The aforementioned Blueberry Buckle or the upcoming season appropriate Pumpkin Crunch Bars?  Or shall I allow summer one last hurrah and bake Strawberry Cupcakes or Shortcakes?

Decisions, decisions…


Monday, July 25, 2016

Blood Orange Cake

The first recipe that I tested from Rachael Ray's latest book, Everyone Is Italian On Sunday, ended up being a cake instead of a pasta dish as I originally planned. The list of pasta recipes that I intend to try are approximately a mile long, but since I love to bake, cake won out.

Here is the Blood Orange Cake in all of its fresh out of the oven glory.

 
 Rachael’s recipe as written in the book calls for the zest and juice of 2 large blood oranges (Seville or navel oranges mentioned as substitutes).  Blood oranges are not easy to find in my area, but I wanted to try and stay true to the blood orange flavor, so I opted to use dehydrated blood orange peel in place of freshly grated zest.  I then used the juice of 2 large fresh squeezed navel oranges.  (If you're using dehydrated peel and don't want to use fresh squeezed juice, (or don't have oranges handy,) you can simply use 1c of orange juice.)

You can really smell the orange while baking and it made my kitchen smell delicious! It is not an overtly sweet cake, so definitely serve it with some sweetened whipped cream. This is a great “mid-day with a cup of coffee or tea” light dessert or snack.

 
Blood Orange Cake 
4 large eggs, separated                                          
2T blood orange peel                                            
2c flour                                                                 
1/4c sliced almonds, finely ground                       
2T baking powder                                                 
1/4t salt
1stick unsalted butter, softened
1c sugar
2T blood orange peel (or zest of 2 oranges)
Juice of 2 large oranges (approx. 1 cup)
1/4c milk

Place a rack in the center of the oven and preheat to 375 degrees.  Grease and flour a 9” round cake pan.

If using dehydrated orange peel, rehydrate by adding 6T of water and setting aside.

With an electric or stand mixer, beat the egg whites on high speed until stiff peaks form.  Set aside.

In a separate bowl, whisk together the flour, ground almonds, baking powder, and salt.

In a large bowl, with an electric or stand mixer, beat the butter and sugar until fluffy.  Add in the egg yolks one at a time, beating well after each addition.  Beat in the orange zest and juice.  Add the flour mixture alternately with the milk and mix on low until combined.  Fold in the egg whites.

Pour the batter into the prepared cake pan and bake until golden brown and a toothpick inserted in the center comes out clean, about 30 minutes.  Allow to cool for 15 minutes in the pan before inverting onto a cooling rack.

(Recipe adapted from Everyone Is Italian On Sunday)